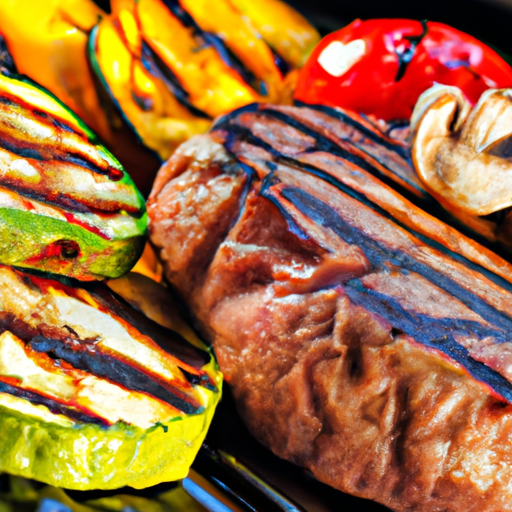
When it comes to low-and-slow grilling on a gas grill, there are a few key considerations that can make all the difference in achieving delicious, tender results. From choosing the right cuts of meat to mastering temperature control, this article will guide you through the essential factors to keep in mind when embarking on your low-and-slow grilling journey. So, grab your apron and get ready to elevate your grilling game to new heights!
Fuel Source
Choosing the right gas
When it comes to low-and-slow grilling on a gas grill, it’s important to choose the right type of fuel. Propane is the most common and convenient option for gas grills. It provides a consistent and steady heat source, allowing for precise temperature control. Make sure your propane tank is full before starting your grilling session to avoid any interruptions.
Using wood chips or chunks
To add a delicious smoky flavor to your low-and-slow grilled dishes, consider using wood chips or chunks in addition to your gas grill. Soak the wood chips or chunks in water for at least 30 minutes before adding them to the grill. This will help them smolder and produce smoke rather than catch fire. Once soaked, place them in a smoker box or wrap them in aluminum foil with holes poked in it. This will ensure a steady release of smoke throughout the cooking process.
Temperature Control
Setting up the grill for indirect cooking
Low-and-slow grilling requires indirect cooking, which means placing the food away from the direct heat source. To set up your grill for indirect cooking, preheat the grill with all the burners turned on. Once the grill reaches the desired temperature, turn off one or more of the burners, depending on the size of your grill. Place the food on the side of the grill opposite the lit burners, creating a zone of indirect heat.
Using a temperature gauge
To ensure accurate and consistent cooking temperatures, it’s essential to use a temperature gauge. Most gas grills come with built-in temperature gauges on the hood, but they might not always be accurate. Invest in a quality meat thermometer to get precise readings of the internal temperature of your food. This will help you avoid undercooked or overcooked dishes.
Using vents to control airflow
Controlling airflow is crucial for maintaining a steady and controlled temperature in your gas grill. Most gas grills have vents on the top and bottom, allowing you to adjust the airflow. Opening the vents will increase the heat in the grill, while closing them will lower the temperature. Pay attention to the smoke coming out of the grill, as it can be an indicator of the airflow. Adjust the vents accordingly to maintain a consistent temperature.
Cooking Time
Calculating cooking time
Low-and-slow grilling requires a longer cooking time compared to traditional grilling methods. To calculate the cooking time, consider the weight and thickness of the meat, as well as the desired level of doneness. It’s a good idea to use a cooking chart or a reliable recipe as a starting point. Keep in mind that these are just guidelines, and you may need to adjust the cooking time based on your specific grill and conditions.
Allowing time for resting
After your low-and-slow grilled meat reaches the desired internal temperature, it’s crucial to allow it to rest before carving and serving. Resting gives the juices inside the meat a chance to redistribute, resulting in a juicier and more flavorful final product. Wrap the meat loosely in aluminum foil and let it rest for approximately 10 to 15 minutes. This rest period will ensure that the meat remains moist and tender.
Preparing the Grill
Cleaning the grill
Before starting any grilling session, it’s important to clean your grill thoroughly. Remove any leftover food debris from the grates and the interior of the grill. Use a grill brush to scrub the grates and remove any stuck-on residue. Cleaning the grill not only ensures better sanitation but also helps prevent flare-ups and unwanted flavors from previous cookouts.
Seasoning the grates
To prevent sticking and create beautiful grill marks on your low-and-slow grilled meat, it’s essential to season the grates. Preheat the grill to a high temperature and brush the grates with a high smoke point oil, such as canola or vegetable oil. This will create a non-stick surface and enhance the flavor of your food. Allow the grates to heat for a few minutes before placing the meat on them.
Prepping the Meat
Choosing the right cuts of meat
When it comes to low-and-slow grilling, certain cuts of meat work better than others. Choose cuts that are rich in collagen, such as beef brisket, pork shoulder, or ribs. These cuts benefit from the low-and-slow cooking method as the collagen breaks down and transforms into tender, succulent meat. Marbled cuts with some fat content will also help keep the meat moist during the long cooking process.
Trimming excess fat
While fat adds flavor and juiciness to meat, excessive amounts can result in a greasy final product. Before grilling, trim any excessive fat from the meat to avoid flare-ups and unwanted, charred flavors. Leave a thin layer of fat to enhance the flavor and moisture of the meat.
Applying a dry rub or marinade
To elevate the flavor of your low-and-slow grilled meat, consider applying a dry rub or marinade. Dry rubs are a mixture of herbs, spices, and sometimes sugar that are applied directly to the meat before grilling. They create a crust on the meat and add complexity to the flavor profile. Marinades, on the other hand, are liquid mixtures that the meat soaks in for a specified amount of time before grilling. They add moisture and flavor from the inside out. Experiment with different rubs and marinades to find your favorite combination.
Adding Smoke Flavor
Soaking wood chips or chunks
To add a robust smoky flavor to your low-and-slow grilled dishes, soak wood chips or chunks before using them on the grill. Soaking the wood helps slow down the combustion process, allowing it to produce smoke instead of burning quickly. Submerge the wood chips or chunks in water for at least 30 minutes before adding them to the grill.
Placing the wood chips or chunks on the grill
Once the wood chips or chunks are soaked, you can add them to your gas grill to infuse the meat with smoky goodness. If your gas grill has a smoker box, place the soaked wood chips or chunks inside it, following the manufacturer’s instructions. If your grill doesn’t have a smoker box, you can create a packet by wrapping the soaked wood in aluminum foil and poking holes in it. Place the packet directly on the grill grates, preferably near the heat source.
Managing smoke production
It’s important to manage the production of smoke during the low-and-slow grilling process. Too much smoke can result in an overpowering flavor, while too little smoke may not add enough complexity to the meat. Monitor the amount and color of the smoke coming out of the grill. Thin, blue smoke is ideal and indicates a proper combustion of the wood chips or chunks. Adjust the amount of wood you’re using and the airflow to achieve the desired level of smoke production.
Cooking Techniques
Using the indirect grilling method
Indirect grilling is the key technique for low-and-slow grilling on a gas grill. This method involves placing the food away from the direct heat source to achieve slow and even cooking. By utilizing the zones of the grill with and without burners on, you can create a consistent heat environment perfect for low-and-slow grilling. Keep the lid closed as much as possible to maintain a steady temperature throughout the cooking process.
Using a water pan
A water pan can be a helpful tool in low-and-slow grilling, especially for larger cuts of meat. By placing a shallow pan filled with water next to the heat source, you can create a moist environment inside the grill. This moisture helps prevent the meat from drying out during the long cooking process. It also helps regulate the temperature inside the grill and reduce the chances of any flare-ups.
Rotating or flipping the meat
To ensure even cooking and prevent any hot spots on the grill, consider rotating or flipping the meat during the low-and-slow grilling process. This helps distribute the heat more evenly and ensures that all sides of the meat are cooked at the same rate. Use tongs or a spatula to rotate or flip the meat gently to avoid losing any juices or disturbing the crust that has formed.
Monitoring the Temperature
Using a digital or wireless thermometer
Accurate monitoring of the internal temperature of your low-and-slow grilled meat is essential for achieving the desired level of doneness. Invest in a quality digital or wireless meat thermometer to ensure precise temperature readings. Insert the probe into the thickest part of the meat, without touching the bone if applicable. This will give you an accurate reading of the meat’s internal temperature.
Checking meat temperature without opening the grill
Opening the grill frequently to check the meat’s temperature can result in heat loss and longer cooking times. To avoid this, use a meat thermometer with a wireless feature or a probe that remains inserted in the meat throughout the cooking process. This allows you to monitor the temperature without opening the grill lid, ensuring that the heat remains consistent and the cooking time is not extended.
Basting and Mopping
Applying sauces or liquids to enhance flavor
Basting or mopping your low-and-slow grilled meat with flavorful liquids can add an extra layer of taste and moisture. Use a basting brush or a spray bottle to apply sauces, marinades, or broth to the meat during the cooking process. This will help enhance the flavor and keep the meat moist. Apply the liquids sparingly to avoid excessive drippings that could cause flare-ups.
Frequency of basting or mopping
The frequency of basting or mopping your low-and-slow grilled meat depends on personal preference and the specific recipe you’re following. Some recipes recommend basting or mopping every 30 minutes, while others suggest doing it less frequently. The key is to apply the liquids at a rate that keeps the meat moist without oversaturating it or washing away the dry rub or crust that has formed.
Resting and Serving
Allowing the meat to rest
After achieving the desired level of doneness, it’s important to allow your low-and-slow grilled meat to rest before carving and serving. Resting allows the juices inside the meat to redistribute, resulting in a tender and juicy final product. Remove the meat from the grill and loosely cover it with aluminum foil. Let it rest for approximately 10 to 15 minutes before carving to ensure optimal flavor and texture.
Carving and serving
Once the meat has rested, it’s time to carve and serve your low-and-slow grilled masterpiece. Use a sharp knife to carve the meat against the grain for maximum tenderness. Serve the grilled meat with your favorite sides and garnishes, and enjoy the fruits of your low-and-slow grilling labor. Remember to savor each juicy bite and share your delicious creations with family and friends.

